Deploy Hugo on Netlify Using Gitlab Pipelines

The current blog uses Hugo as the static site generator with a forked theme of Even. I’ve managed to use Gitlab Pipelines to deploy the site to Netlify.
The blog uses git submodule for its theme. This way, every time I make customizations on the theme, I can easily update the theme as part of the parent repository itself. The configuration for Gitlab Pipelines will all be in the .gitlab-ci.yml file.
In order for Gitlab to use submodules, the variable GIT_SUBMODULE_STRATEGY will need to be set.
variables:
    GIT_SUBMODULE_STRATEGY: recursive
The default stage is test although I’ve defined 3 stages for the deployment:
- Setup: Sets up the theme
even— installing the necessarynpmpackages usingyarnand building the theme. - Build: Builds the actual hugo website with the output directory set to the default (
public). - Deploy: Deploys the site to Netlify.
The stages run separately one after another. This can be defined in the .gitlab-ci.yml like so:
stages:
    - setup
    - build
    - deploy
Setup
My idea of a set up involves preparation of any files that would be needed to build the site. Currently, I only have building of the theme (since I’ve customized the theme) for this stage which would be just a single job.
The theme even uses yarn and webpack from the project’s scripts to build the assets — minified and updates a json file that points to the latest assets.
For this job, I only need to cd to the theme’s directory, install the necessary npm packages, and build the assets. After building, I would need to pass over the built theme over to the next stage by using artifacts. I’ve also used the image node:6.17.1 which is the version that works with the webpack package required by even.
The job for the setup stage looks like this:
setup:
    image: node:6.17.1
    stage: setup
    before_script:
        - cd themes/even/
        - yarn install
    script:
        - yarn build
    artifacts:
        paths:
            - themes/even/
    only:
        - master
    cache:
        paths:
            - node_modules/
            - .yarn
The cache key allows speeding up the build process by preserving vendor packages. At this point, this isn’t really necessary since it will not be reused in other jobs and/or stages.
Build
The build stage is quite simple which involves a single job as well — building the actual site. The command hugo with no parameters does this job.
The only considerations I had were using the extended version of hugo (in order to use SASS/SCSS with Hugo Pipes) and again, passing the artifact over to the next stage. I’ve also added the setup stage as a dependency.
So far, the job for the build stage looks like this:
build:
    image: registry.gitlab.com/pages/hugo/hugo_extended:latest
    stage: build
    script:
        - hugo
    artifacts:
        paths:
            - public/
    only:
        - master
    dependencies:
        - setup
Deploy
Deployment involves a single job as well. This is to only publish the ‘public’ directory to Netlify. The netlify.toml simply contains the configuration for the “Publish directory”:
[build]
    publish = "public"
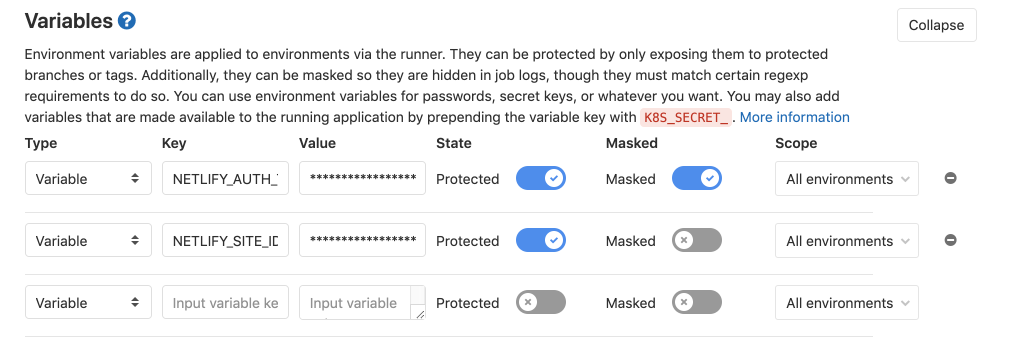
I’ve used variables to store the authentication token (NETLIFY_AUTH_TOKEN) and site ID (NETLIFY_SITE_ID) to deploy to Netlify using Netlify CLI. These variables are defined under “CI / CD Settings”.
The steps involved in deployment are installing netlify-cli and deploying with netlify-cli. The job simply looks like this:
deploy:
    image: node:latest
    stage: deploy
    before_script:
        - npm i -g netlify-cli
    script:
        - netlify deploy --site $NETLIFY_SITE_ID --auth $NETLIFY_AUTH_TOKEN --prod
    only:
        - master
    dependencies:
        - build
So far, these are the only steps involved when building the site. This is automatically triggered every time a push is made to the master branch. You then get a nice report of which stages failed and which ones succeeded.

I’ve found this workflow very convenient for me. Netlify also supports CD although I find Gitlab Pipelines more flexible if I would ever need additional steps during deployment.